
Getting Started with Pen Pals~

Includes:
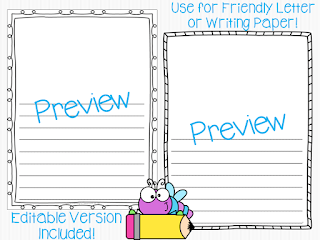
•150 editable and pdf format writing templates
(differentiated & can
be used for writing paper!)
•Pen pals checklist (editable)
•Pen pal address permission slip (editable)
•Pen pal photo sharing permission slip (2 editable versions)
•Pen pal letter display sign (2 versions for use if displaying the
letters)


Getting Started with Pen Pals:
- If you don’t have a classroom in mind already, decide what state/states you would be interested in doing pen pals with.
- I had 5 states I was interested in across the country. I went online to those school districts. I looked at a school website from each state. I found the staff page with teachers and their websites/email addresses. I selected the grade I wanted and emailed the teacher. I did this for each of the 5 states. The first to respond was who we became pen pals with. And we have been doing it every year since!
- Ask your communicating teacher to email you a class list right away so you can pair the students! Be sure to ask him/her if there is a student that can handle more than 1 pal in case the number of students are not the same in each class. This was my approach and just supposed to be a helpful hint. If you have a very young grade, you may want to wait until 2nd quarter to begin.
- We used one of the templates in the file you downloaded, and did our first letter within the first 2 weeks of school. I modeled the letter on the white board. I helped the students fill in the blanks, if needed. I keep a stack of small scrap paper pieces on my desk. Whenever a student needs help with a word, we use our dictionaries or our word wall. But whenever a student needs help with a sentence or more, I dictate for them on the scrap paper and they can transfer this to their own paper- This is a helpful strategy for the first few letters and as students are developing their writing skills. Spelling should be accurate in a final product that is going to be displayed (or mailed).
- We write monthly, but you can work out the frequency with your communicating teacher.
- I give my students envelopes to seal their letters in. You can just send the letters in a stack without doing this as well. If you are going to use envelopes, have the students decorate them and put their pal’s name on them. Use a checklist to ensure all letters have been turned in before mailing!
- We usually add a sticker, a pencil or some little school trinket in with each letter. Students usually make a picture to send with their letters as well. When school pics become available, it's always nice to include one in the student letters, with parent permission, of course. You’ll find a permission slip attached.
- As the teachers, we chose to do a letter to the other classroom as well. We wrote a general letter that usually included a fact about our city/state, upcoming school events, an appropriate joke, and things of that nature. We also included photos with the letter so the other class could see our class, school, classroom, areas around our school and so on. We sometimes include favorite classroom books (order an extra from Scholastic).
- The letters the teachers write can be letter size, but it’s best to write them on chart paper. This is great modeling for both classes. The teacher letters are hung in the hall outside of the classrooms so others can learn about the other state as well. The photos really help your display pop! Just fold up the teacher letter you write and mail it with the student letters.
- I copy my students’ letters before they seal them and mail them. I display them with the letter the teacher from the other school sent to our class. This makes for a great display, and it shows off your students’ hard work!!!
- When it’s time to copy and display the next month’s letters, I tape them right over the old letters. This keeps your display fresh and allows for the students to see their progression in writing. The parents (and administrators) enjoy seeing what their students have been writing about as well! By the end of the year, most students are not using a prompt to write their letters.
- Make sure you include enough time in your literacy block for this activity. While it’s only monthly, it does take up my entire literacy block before we’re all signed, sealed, and delivered. (Sometimes longer in the earlier months.)
- Use the provided checklist to make sure all letters/envelopes have been collected before mailing! Check them off as they are turned in to you.
- Districts often will mail your large envelope at no cost to you as it is school related. Find out before you spend money on this yourself!
- It is really fun to Google Earth the other state and school. We look at the school and compare playgrounds and things of that nature.
- Writing these letters is a great way to combine cultural relevance and diversity with writing and fun! And let’s face it… Sometimes writing is hard to teach! Am I the only one that feels that way??? This gets the students excited about writing! Let the adventures begin!!!J
Click Here for the Pen Pals Pack: Pen Pals Pack!
Please visit my store for more lesson plans and ideas. Thank You!!!J
Mrs Wenning's Classroom on TpT
Mrs Wenning's Classroom on TpT
You can find me on Pinterest as well…
PS: This was my very first blog... How'd I do??? :)
No comments:
Post a Comment
Feedback is always appreciated! Thank you so much for stopping by! Be sure to follow and get notified of Giveaways, Freebies, Sales, and Helpful Teacher Tools & Tips!